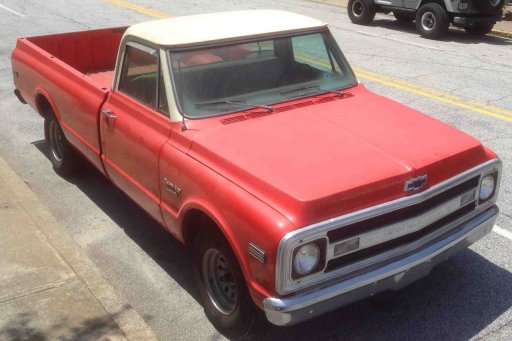
Before Side View
Before Side View
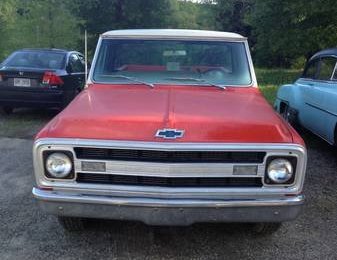
Before Front View
My plan for the truck's drivetrain was to keep things close to stock, but modernize a little and give it more performance. I plan to keep a small block Chevy V8 engine, and keep a carburetor. I plan to keep the 3 speed automatic transmission. I plan to keep the original 12 bolt rear axle and put in a limited slip differential. A fleetside longbed C-10 should weigh somewhere between 3800 and 4000 pounds.
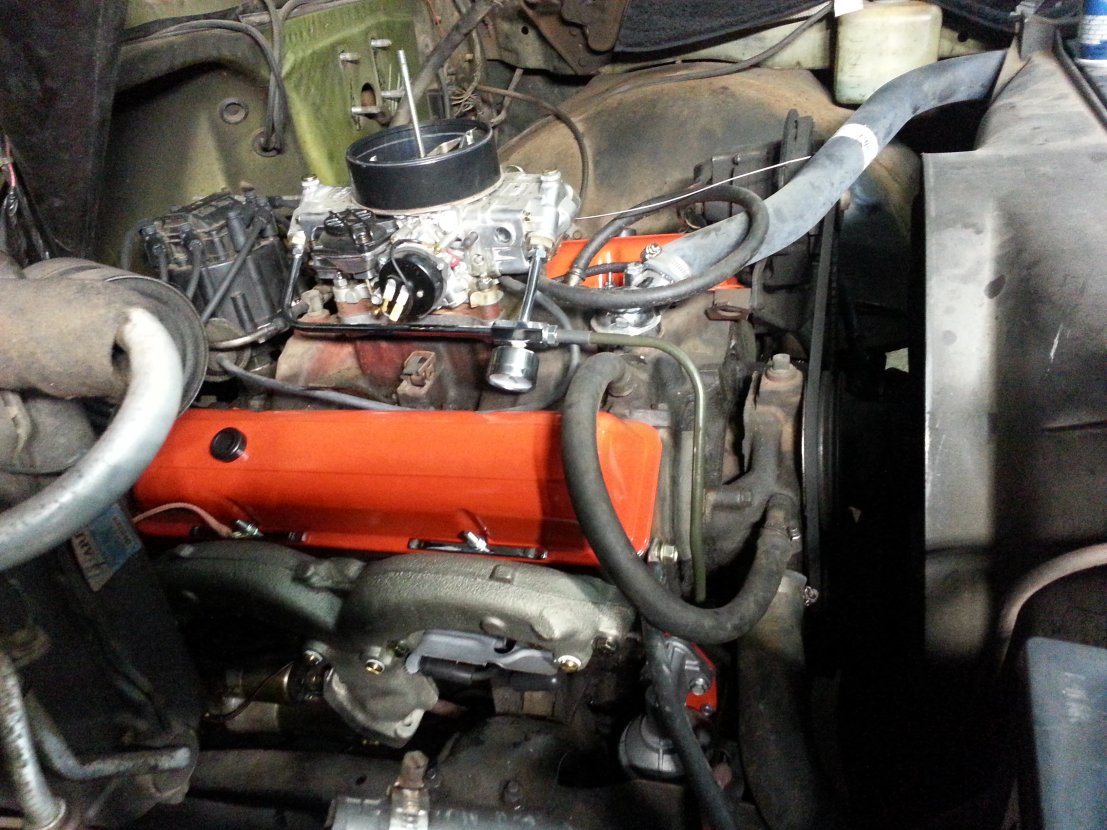
Original Engine with New Carb,
Replaced Exhaust Manifold &
Painted Valve Covers
The truck came with the original 350 V8. The odometer showed a little over 60,000 miles, but it could easily be 160,000 miles. This engine is an LS9, and has 165 hp at 3800 RPM, and 275 lb-ft of torque at 1600 RPM, It has an 8.3 compression ratio.
Because the current engine does not have hardened valve seats for unleaded gas and has ring problems with the #3 cylinder, I plan to change it. But I wanted to keep a small block.
My goals for the replacement engine were to have low end torque, and good vacuum at idle (minimum of 17" Hg) for the power brake booster. I planned to use a 4 barrel carb and a dual plane intake manifold. I also planned to use the original cast iron ram horn exhaust manifolds. Small blocks generally have better flow numbers on the intake side than the exhaust, so using iron exhaust manifolds hindered flow just a little bit more. But I've had headers on other vehicles, and they tend to leak around the head and be a little noisy.
There are a lot of choices when selecting small block features. I wanted a later model one-piece rear main seal block to reduce the chance of an oil leak. I also wanted a later model block that allows a hydraulic roller cam so that I don't have to add zinc to the oil and get a little bit of power back. And I wanted a 4 bolt main block - this is needed when power levels go to about 400 horsepower, although I did not plan to go that high. I decided that I wanted a 350 or 383 cubic inch block.
After pricing a rebuilt engine with the features I wanted, it became apparent that going to a new engine was more cost effective. I was looking for low end torque, and not necessarily high RPM power. I found that a lot of crate engines were built with an aggressive cam to get big power numbers at higher RPMs.
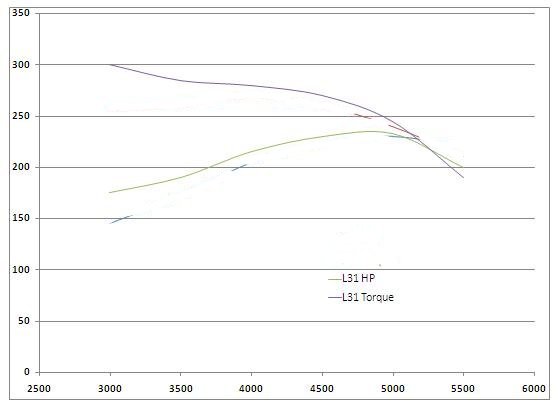
The L31 5.7L replacement Vortec engine is still made by Chevy (P/N 19432780), and has 255 hp at 4600 RPM and 330 lb-ft of torque at 2800 RPM. This has iron 64cc Vortec heads with a 9.3:1 compression ratio, a forged 1053 steel crank, and hypereutectic pistons. This is $5473 at Summit in early 2026. This has a harmonic balancer.
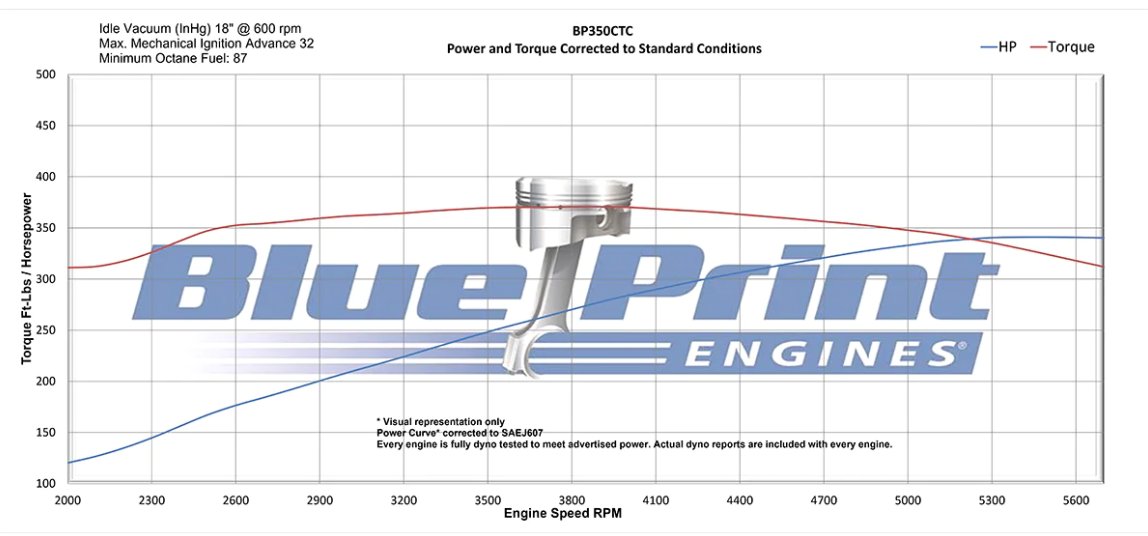
Another good choice is from Blueprint Engines. They make a BP350CT that uses a new 350 block, 64cc Blueprint aluminum heads, an hydraulic roller cam, and hypereutectic pistons. A little confusing since the website says cast steel and then cast iron crank. This also has 4 bolt mains and a one piece rear main seal. This has a 9:1 compression ratio. And this runs on 87 octane fuel. This has 341 hp and 371 ft-lbs of torque. 350 torque at 2500 RPM, with peak torque at 3800. 200 hp at 2900 RPM, and peak hp at 5400. These heads have the exhaust port raised .5" over stock. This is $5100 at Summit in early 2026. These can use perimeter or center bolt valve covers, and fit a standard or Vortec intake manifold. This engine should make 18" of vacuum at 600 RPM idle. This engine appears to need a melonized drive gear on the distributor.
Stock 5.7L Vortec
L31 Power Curve
Blueprint 350CT
Power Curve
I like the Blueprint 350CT engine best of these options. It has aluminum heads and screw in rocker studs. For this engine, Blueprint recommends a 600 CFM carb, stock non-weighted 8" harmonic balancer, a late 350 weighted flexplate, and a stock stall torque converter (1600-1800 RPM).
This truck originally had a distributor with points. This had already been changed over by a previous owner to a GM HEI distributor. I will continue to use an HEI ignition. The new engine will likely have a billet hydraulic roller cam, and the distributor will need a drive gear with a melonized coating.
I'm using the original ram horn cast iron exhaust manifolds with a 2" collector, painted with ceramic paint. The exhaust is mandrel bent 2 1/4" diameter dual exhaust pipes. These manifolds use 3/8"-16 x 2.25" long bolts on the outside positions, and 2.75" long bolts in the middle to attach to the heads. Four of the shorter bolts are used per side, and two of the longer ones.
The new engine will likely not have a location for a mechanical fuel pump, so I will use an electric one.
I want low end torque, and don't care about high RPM horsepower. I will not be doing any drag racing, and just want a nice cruiser with torque for driving on the street (1500 to 4000 RPM). I don't plan on towing anything, but can see where there might be a few hundred pounds in the bed. There are a lot of videos out there saying that the Edelbrock RPM Air Gap manifold makes the best power, but they are looking at peak horsepower above the RPM range that I will be using. Keeping the left and right plenums divided helps with keeping a cleaner low RPM induction pulse, and the longer runners help with low and mid power (Reference).
I also want a thermal insulating spacer between the intake manifold and the carb, made of wood or phenolic to keep heat out of the carb. Twenty or more years ago, a 1/4" spacer might have been enough, but today's gasoline evaporates more easily, since it is blended for fuel injection and not a carb. So a 1/2" spacer seems best. I have plenty of hood clearance for this.
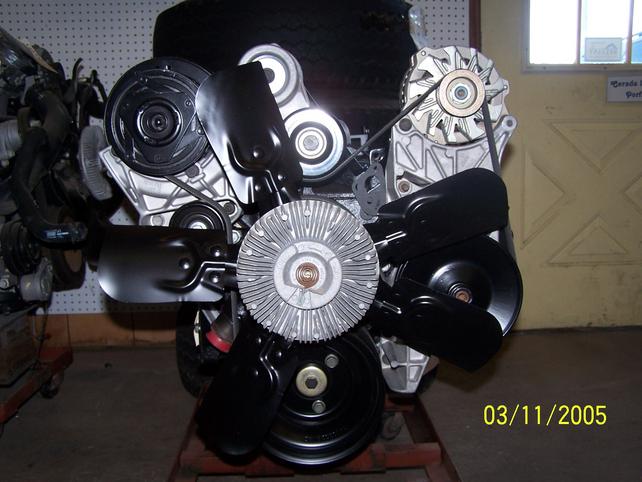
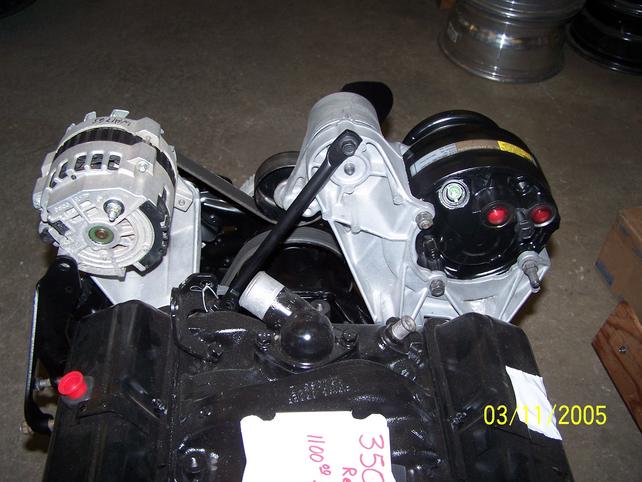
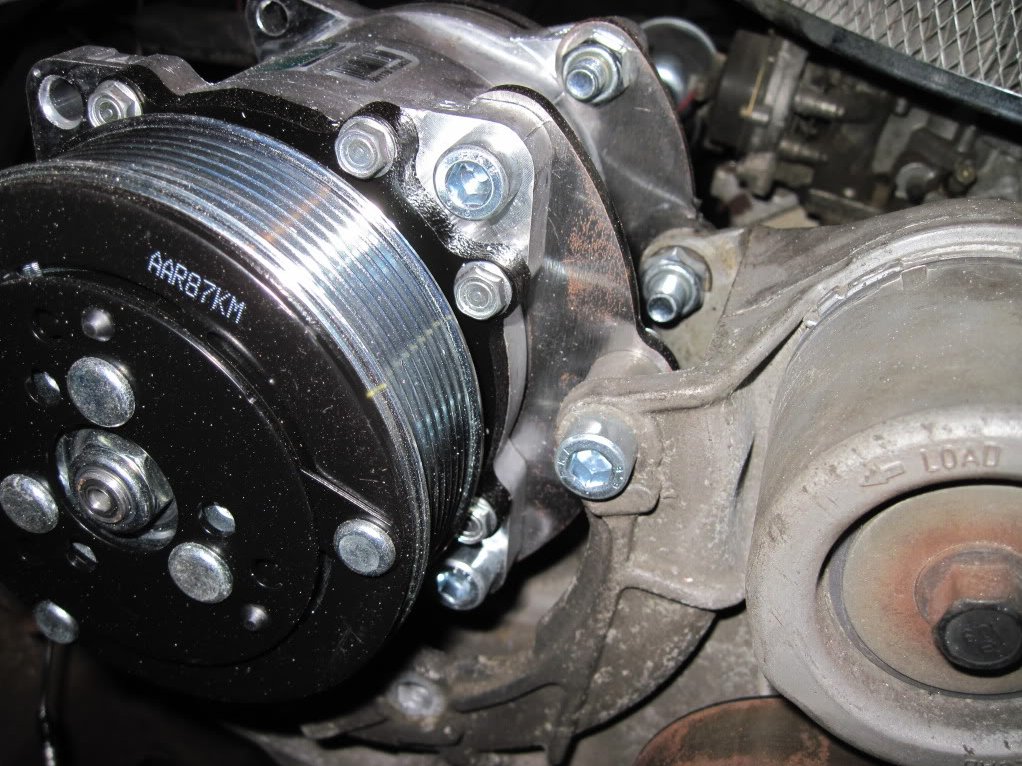
I'm using a serpentine belt system so that I can fit a late-model high output alternator. The serpentine belt with a tensioner keeps even pressure on the pulleys and keeps the belt from slipping, or wearing out the bearings on the accessories if it is too tight. I'm using stock 1989-1995 Chevy 1500 truck brackets, pulleys, thermostat housing and power steering pump. I'm using a Sanden A/C compressor and a CS-144 alternator.
Serpentine Front View

Serpentine Driver's Side
Serpentine Back View
Vintage Air Bracket - puts a
Sanden compressor in R4 mount.
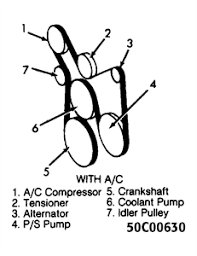
Serpentine Belt Routing
I'm using an aluminum radiator from DeWitts, an aluminum fan shroud I got on eBay, and two 13" Spal electric fans to keep the engine cool. I'm controlling the fans with a PWM controller from AutoCool.
I have a stage 2 long reverse rotation water pump from Stewart (P/N 23123), and a Stewart-modified Robert Shaw 195 degree thermostat that has holes to allow Vortec heads to have a water jacket bypass.
The lower radiator hose is a Dayco E70664 with a 1 3/4" inside diameter at both ends. This lower hose needs to have about 6" trimmed off the radiator end when using a long water pump. And when putting this hose on the radiator, make sure it goes on all the way - don't let the radiator shroud get in the way.
With the serpentine drive, the original upper radiator hose comes too close to the serpentine belt near the alternator. I'm using a thermostat housing from an 88-95 Chevy truck which is GM P/N 10147884 or Dorman P/N 902-694. This sends the hose more up from the engine than the original setup. The new upper radiator hose is AC Delco P/N 26025X, which has a 1 1/2" inside diameter at each end. This upper hose needs to have about 6" trimmed off of the thermostat housing end.
The stock transmission is a TH350 3 speed automatic transmission. It seems to work fine. But a new engine will have more power, so the transmission needs to be updated to handle more power.
I plan to stay with a TH350 transmission. This truck needs a 9" tailshaft housing.
I will use a Lokar kick down cable from the carb linkage to the TH350. I will also connect a hose from full manifold vacuum to the modulator valve on the TH350.
I'm deciding on having a local shop build the transmission, or buy a transmission from TCI or Hughes. Or I may build it myself.
The weakest point of the TH350 is the intermediate sprag race. This is over-hardened from the factory, making it brittle. At 400 to 450 ft-lbs of torque, this part will not last. Sonnax makes a replacement intermediate sprag race (p/n 35723HD-02) that works well. The stock 8 element sprag should be swapped out for a new one. ATI & BTE makes a modified direct drum with a 36 element sprag race. This 36 element sprag with the drum is an expensive part, and is really only needed for power levels above 600 ft-lbs.
The center support with low/reverse sprag and race from a 700R4 or 4L60E from '87 and later is a stronger piece and is a drop in replacement. This gives a wider low/reverse sprag for more strength.
Another weak point is excessive end-play between the pump and the center support, resulting in wobble of the direct drum. This can be addressed by adding an extra thrust washer between the planetarty gear and direct clutch, and using a wide bushing in the direct drum.
The direct clutch piston originally has 4 frictions in it (and maybe 3 frictions in TH350s behind a 6 cyliner engine). This can be machined down (or purchased already machined) to allow going to 5 frictions. This is an almost must have - otherwise the transmission will wear out early, especially with a more powerful engine.
I will use performance frictions. I'm leaning toward Raybestos Stage-1 Red or Raybestos GPZ.
An adjustable modulator valve will be used. Alto and non-USA brands are apparently to be avoided - they tend to leak ATF thru the valve and into the intake manifold of the engine.
Using teflon seals where I can will help with holding more power.
Firming up the shift is a good idea. A shift kit can be used, or this can be done by modifying a few parts while the transmission is apart. The shift kit is convenient because it can be done on the vehicle by only dropping the pan. But if the transmission is being rebuilt, either method works.
Regardless of which direction I go on the shift kit, I will do the following:
Blueprint Engines recommends a stock (1600-1800 RPM) stall speed torque converter for the CT350 engine.
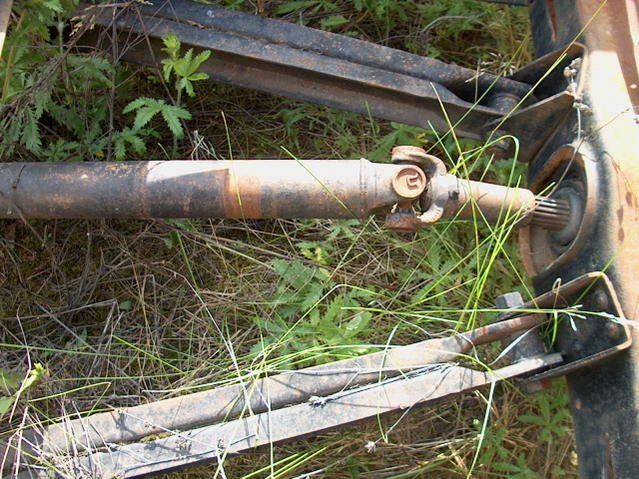
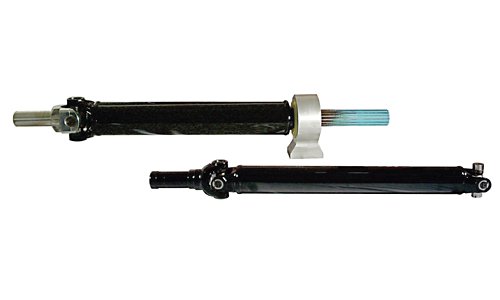
The 1970 C10 long bed pickup trucks with a 350 V8, TH350 transmission & a 12 bolt truck rear axle have a driveshaft that is a 2-piece design with a center support bearing. The short bed versions have a 1-piece driveshaft. The TH350 transmission used on C10s have the longer 9" tailshaft, instead of the more standard 6" tailshaft.
The 2 piece driveshafts used on longbed 1/2 ton C10 trucks with an automatic transmission do not have the best reputation. On these trucks the only slip joint is in the front half of the driveshaft where it goes into the transmission. The problem is that the front half of the driveshaft is pressed into a carrier bearing that is suspended in a rubber mount, and the carrier bearing is bolted to the frame of the truck. The back half of the driveshaft has no slip joint. So when the driveshaft needs to move back and forth on the slip joint, it stresses the rubber mount for the carrier bearing, eventually tearing it apart.
There are 3 ways to fix this:
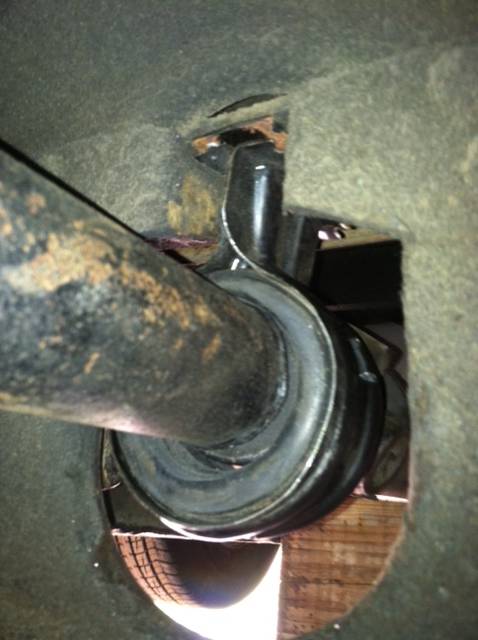
Front View
C10 Carrier
Bearing & Driveshaft
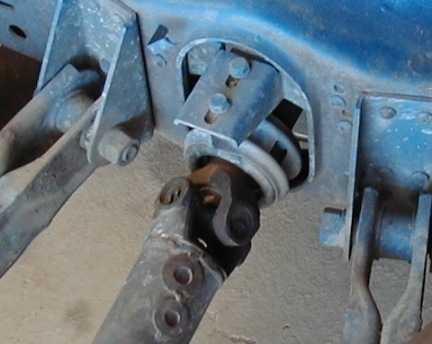
Rear View
C10 Carrier
Bearing & Driveshaft
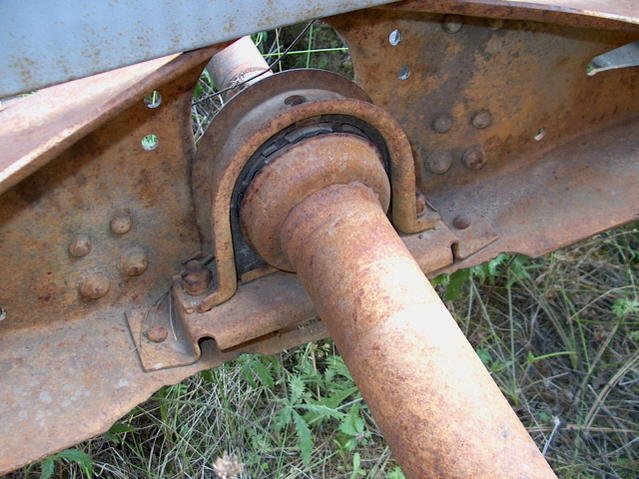
Front View
C20 & C30 Carrier Bearing
Rear View
C20 & C30 Carrier Bearing
My C10 After Rebuild
With Stock Carrier Bearing

Stock C10
Carrier Bearing
Stronger C10 Bearing
Fits C10 Bolt Pattern
Denny's Back Half
C10 Driveshaft
w/ Better Bearing
Performance Online
& Inland Empire
C10 Driveshaft
Note that the "stronger" C10 carrier bearing *must* use a slip yoke rear driveshaft, since ithe polyurethane flexes less than the stock rubber piece.
I am going to keep using the original driveshaft for a while. I will consider changing to a Denny's, Inland Empire, or a Performance Online driveshaft upgrade in the future.
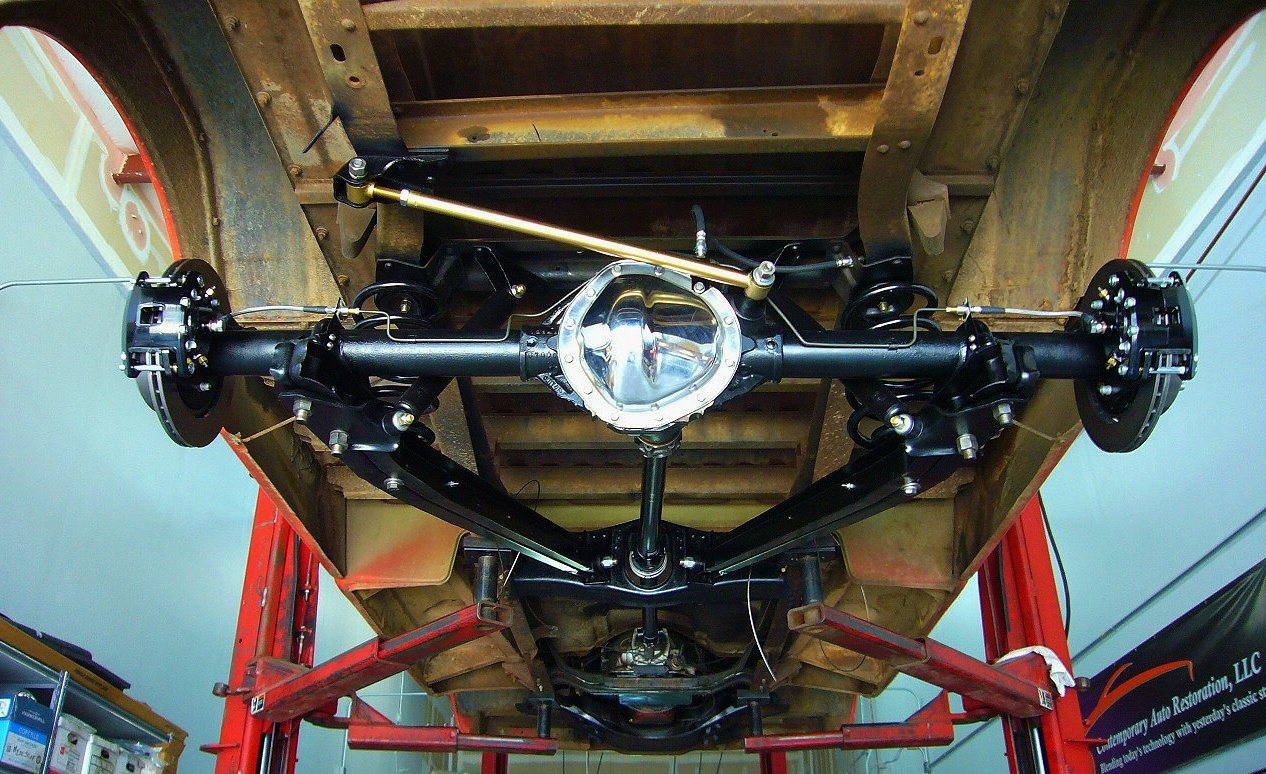
From 1963-1970, the rear axle had a width of 62" from wheel mounting surface to wheel mounting surface (WMS-WMS). During the 1970 model year until 1972, they changed to 63.5" WMS-WMS. My truck has a 63.5" wide axle.
The axle shafts of the rear Chevy 12 bolt truck axle were replaced with Moser "street" axle shafts during the rear brake upgrade to change to the new wheel bolt pattern. The truck came with a 3.08 rear axle gear, and was switched to a 3.42 ratio from Yukon Gear. The stock open differential was replaced with an Auburn Gear limited slip differential. The Chevy truck 12 bolt axle with 30 spline Moser street axles should be able to handle 600 hp & 600 lb-ft of torque.
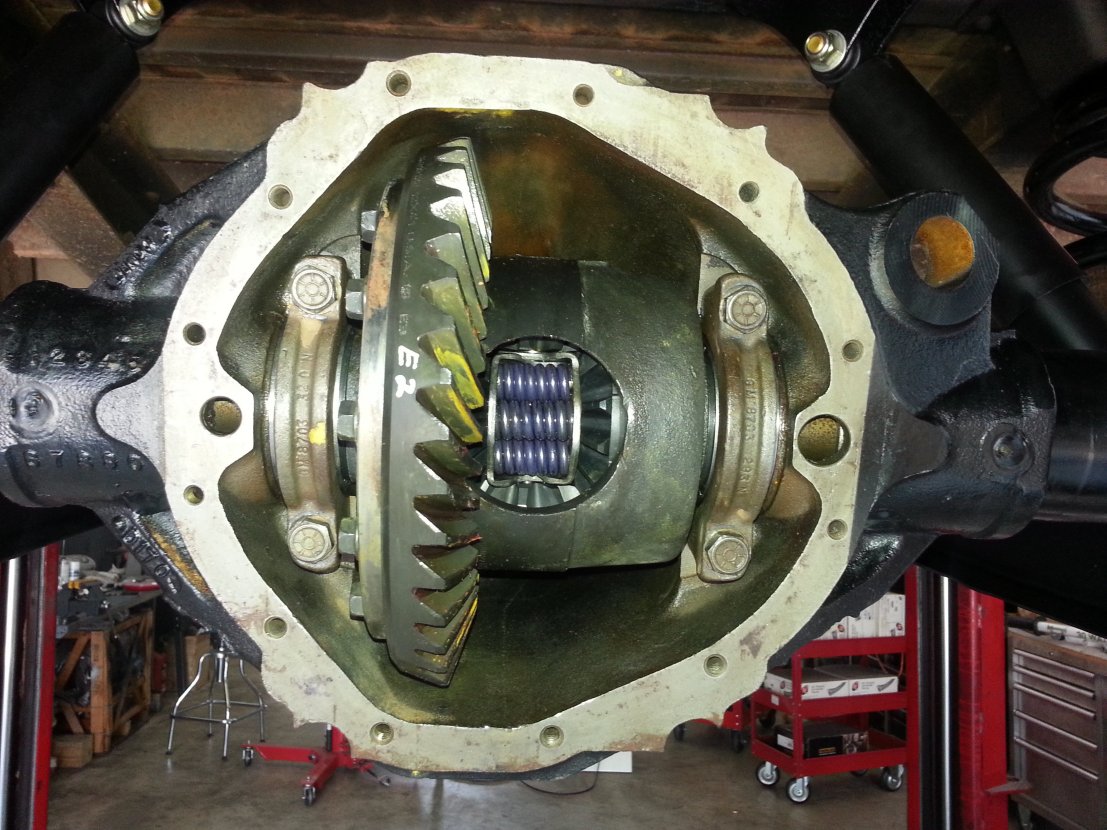
Auburn Gear Differential
The original factory wheels were 15" x 5.5" with 6 lugs on a 5.5" bolt circle, with G78-15-B tires. The wheels were 15" x 7" with the same bolt pattern when I bought the truck. The wheels I am using are American Racing Torq Thrust II - 1 piece with a polished finish in a 17" x 8" size. The 17" diameter is needed to clear the front brakes. I am using Michelin Latitude Tour P255/60-17 tires (29.1" diameter).
During the brake upgrade, the bolt pattern was changed to 5 lugs on a 5" diameter. Not all 17" wheels will clear the Kore3 front brakes, but the wheels and brakes were common enough that there were pictures of this combo on other vehicles on the Internet. Even then, a 1/2" spacer is needed between the hub and the front wheels to get room to pass the hub center through the wheel and to get clearance between the caliper and the inside of the wheel. With the spacer, the caliper will be about 1/8" from the inside of the wheel surface.
These Torq Thrust II wheels in this size and bolt pattern come in 4", 4.25", 4.75", 5", 5.25" and 5.75" backspacing. I'm using the 4" backspacing (-12 mm offset) to push the tire/wheel out to help fill the wheel wells. This offset gives about 1 1/2" clearance between the inside of the tire to the frame in the rear, and helps keep the wheels/tires from rubbing the PB Fab A-arm anti-sway bar mount on the front. Note that the rear axle on 1970 1/2-72 C10 trucks (63.5" wheel mounting surface to wheel mounting surface) are about 1 1/2" wider (3/4" on each side) than 1967-70 1/2 C10s (62" wheel mounting surface to wheel mounting surface).
I found center caps for the wheels that have a Chevy bowtie logo on them to replace the American Racing logo. I'm using Gorilla Guard wheel locks on the wheels.
I am keeping the gas tank behind the seat so that I can have a spare tire stored in the original location under the bed. I've got a dual exhaust, but the pipes exit on the sides just behind the rear tires, so they do not get in the way of the spare.
The issue is that the original wheel/tire combo is 8.4" wide and 28" in diameter and I am running a wheel/tire combo that is 11" wide and 29.1" diameter. After cutting off the original spare tire mounting hardware because of rust, I got some replacement hardware. I got a cross strap for a 1975-1987 Chevy truck, but the original part will work fine if it can be cleaned up. The issue is that both of the bolts holding the cross strap need to be longer because of the wider tire. The bolt for the removable side (rear passenger's side) from a 1975-1987 is long enough. The other fixed bolt (front driver's side) needs to be about 12" long, and have 1/2"-13 or 1/2"-20 threads. I used 2 nuts on the fixed bolt side with JB Weld to make it theft resistant, and used the factory hand nut (it has a plastic threaded insert) on the other side to be able to function with some rust.
The removable nut side can be locked in place with a padlock that has an adjustable shackle that comes off - the U-shaped shackle is put through the eye loop on the nut and put through the hole in the cross brace, then locked in place with a Master Lock model 510D. It is a good idea to put grease on the key lock area and put tape over the key area to keep rust from freezing the lock up over time.
To hold the wheel in place on the cross brace, I removed the original brackets because they looked like they would scrape up the inside of the wheel. I used a couple of bolts facing up as pins to go through the wheel mounting bolts holes, and then used lug nuts to hold the wheel tight. I am using a powder coated 17"x 8" steel wheel instead of an aluminum wheel for my spare to keep corrosion away a little.
Spare Tire Lock