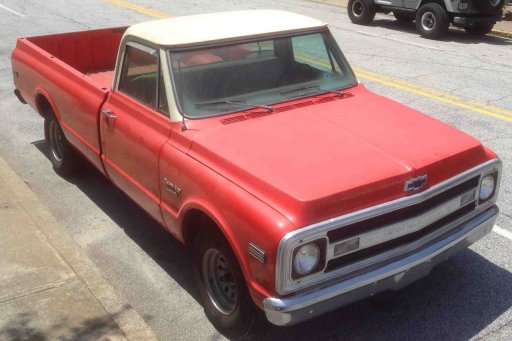
Before Side View
Before Side View
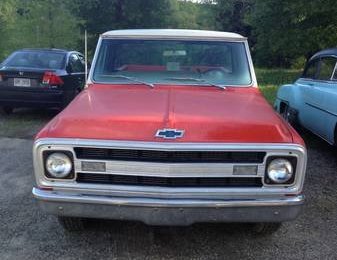
Before Front View
I want the interior to look mostly stock, but with a few updates. I want to add a few gauges and put in 3 point seat belts. I want to get the air conditioning and radio working, but leave them looking basically stock. And I want to freshen up the interior with new upholstery and carpet.
The original steering wheel that came from the factory is a plastic 2 spoke style that is 17" in diameter. This large diameter might have been good for a truck with no power steering, but it makes it hard to get in and out of the truck. When I bought the truck, the steering wheel had already been replaced with a 15" GM "comfort grip" wheel. The steering column was the original green color, the hub adapter was gray, and the steering wheel was blue with a Buick horn button. And the horn did not work. The grip area on the steering wheel was kind of sticky - I guess the plastic/rubber grip was starting to go bad. The comfort grip steering wheel was never available on a C10 truck, but was an option on Camaros, Chevelles and Corvettes, along with some other GM models.
I do not know what part number a previous owner replaced the original hub with, but it might be a GM part number 3930062. This is available from OER Parts. The "newer" hub adapter is for a steering wheel with a "stepped" center hub, which the comfort grip wheel has. It has a diameter at the base of 4", a diameter at the steering wheel of 3", is 1 7/8" high, and has 36 splines. It is meant for 67-68 GM cars and 67-72 Chevy and GM trucks.
I replaced the steering wheel and horn button with a new comfort grip wheel, but with a black outer rim and a Chevy bowtie logo on the horn button. As a bonus, I got the horn to work with the parts that came with the steering wheel horn button. This steering wheel has a 2.75" dish, and a grip area that is .84" in diameter. The "stepped" steering hub that an earlier owner replaced is required for this, since the original steering wheel has a flat hub.
I may replace this in the future with a 14" wheel with a 2.5" dish and a 1.1" diameter leather grip from Lecarra (part number 65801). Lecarra has been purchased by Lokar, and the Lokar website has better info than the Lecarra website. This steering wheel will use the stepped hub that I have (not original to the C10) and the horn button from the comfort grip steering wheel. This steering wheel is a little expensive, but gets very good reviews.
The gas pedal was replaced with one from Lokar. This changes the original rod & pivot throttle linkage to a cable linkage. The cable throttle linkage makes it easier to put the throttle and transmission kickdown linkage on the carb.
The original seat belts were only lap belts, but Chevy put anchor points into the rear upper cab to mount shoulder belts. I installed a lap/shoulder belt kit from Brothers Trucks.
I installed a gray dash pad & parchment armrests from Classic Parts.
I put in black nylon loop carpet from Auto Custom Carpets.
I reused the existing seat frame, but got new seat covers in off white vinyl with black/white houndstooth cloth inserts and new seat foam from Classic Parts. I'm happy with the seat back foam, although I really did not need it. On the seat bottom, I really did not need new foam. The new seat bottom foam makes the seat fabric so tight that I needed to use zip ties instead of hog rings in a few spots to get an extra inch here and there. And the new seat bottom makes the seat so high that it is hard to get my legs past the steering wheel and my head touches the roof. I am happy with the new vinyl/fabric cover.
I replaced the seat brackets with ones from Full Custom Fab. These lower the seat 2". The mechanism to move the seat back and forth goes away, but these brackets have a slot to allow a one-time adjustment when installing. Now the seat height is good.
I liked the look of the original dash, but I wanted to make some changes. The original dash only had a speedometer and fuel gauge. There was an option that added an ammeter, water temperature, and oil pressure gauges - this came standard on the "CST" trim level. The optional gauge panel still left a large hole in the middle of the panel. I wanted a voltmeter instead of an ammeter, and I wanted to add an Air/Fuel ratio gauge. So I decided to fit aftermarket gauges that followed the factory layout.
I got a new factory dash bezel, and put a panel over it from Front Panel Express with cutouts for the gauges and indicator lights. Since the dash has an irregular outside shape, I started with a CAD file for the outline - Draw1A.dxf. I then took that outline and used software from Front Panel Express to make cutouts for the dash items - DashSpeedHutB.fpd. I used indicator lights for the turn signals and high beam lights intended for a Ford Cobra. I got gauges from SpeedHut. The speedometer and tachometer are 4" diameter, and the speedometer is a GPS unit. The GPS antenna is small and sits under the dash near a plastic defrost vent to get a good signal. The other gauges are 2 5/8" diameter with a 90 degree sweep, come with very good sending units, and have built in warning lights that can be programmed to come on when the readings are too low or high.

Original Dash
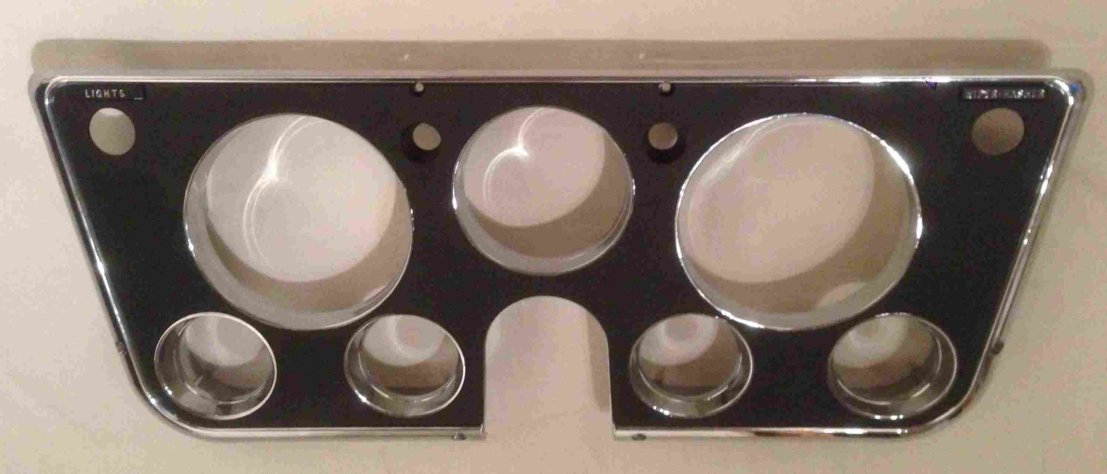
New Dash Bezel

Panel from Front Panel Express
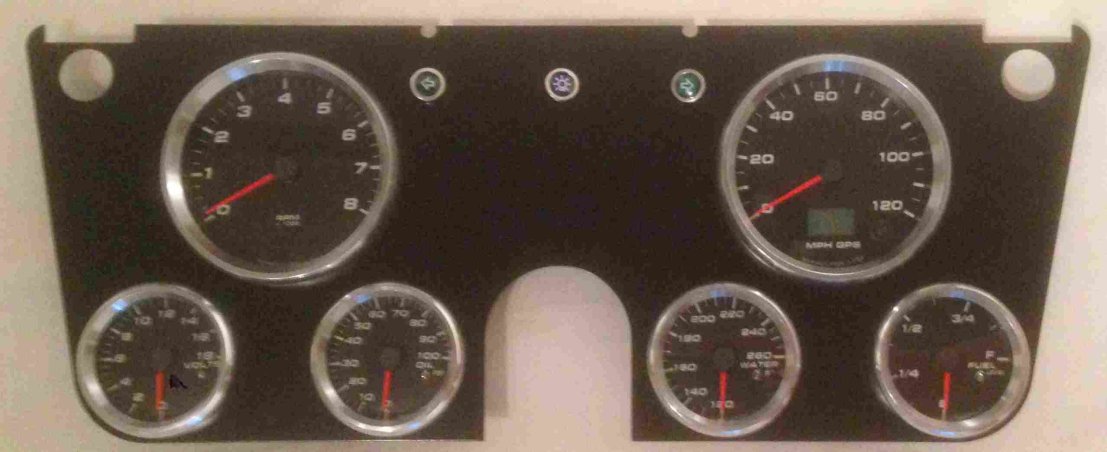
Gauges and Indicator lights in Panel
The original radio was an AM radio, but it did not work when I bought the truck. I replaced this with a Retrosound radio. This is a RetroRadio for a 1967-72 Chevy C/K truck. This has the chrome/black face option to put chrome around the faceplate and has black push buttons. This can be configured with a few core radios behind it - from just Bluetooth, AM/FM and internal speaker amp, to adding USB inputs and RCA jacks out for an external amp, to adding a connection for a SiriusXM module. The Bluetooth connection also integrates phone calls, using the radio speakers and an included microphone. I also got center knobs that match the original radio from Retrosound. Retrosound provided black outer knobs, but I'm using the original chrome outer knobs. The chrome bezel needs to be cut out to match the holes in the dash for the knobs, and the cup-like pieces that come from the front of the knobs needs to be used. I'm using the Motor 4 radio and here is a link to the manual.
The factory speaker was a single (mono) 4 x 10 speaker that is in a frame called a "special rectangle". I wanted a single 4 x 10 speaker with dual speaker drivers to get stereo. There are 4 x 10 speakers that have a single woofer and dual tweeters in them, but the A/C vent just below the speaker does not generally allow room for the speaker magnet. A better way to go is to get a 4 x 10 speaker with two 3.5" or 4" speakers. I'm using a single unit with 2 drivers from Electro-Tech that fits in the original 4 x 10 "special rectangle" size speaker location in the top front of the dash. This is the "Stereo High Output" version with dual 4" speakers.
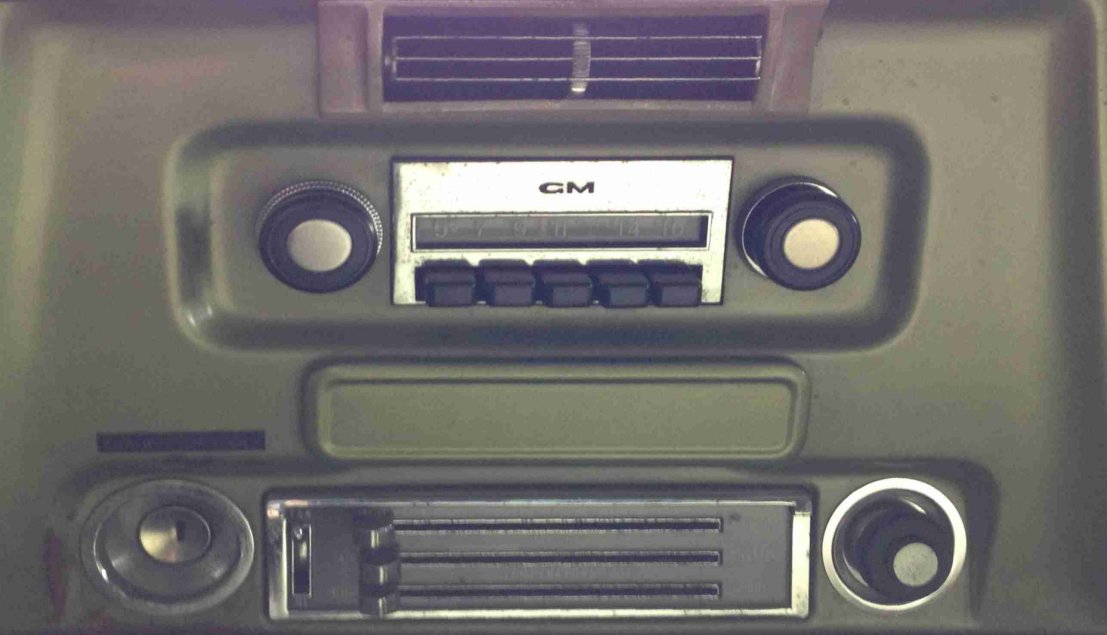
Original AM Radio
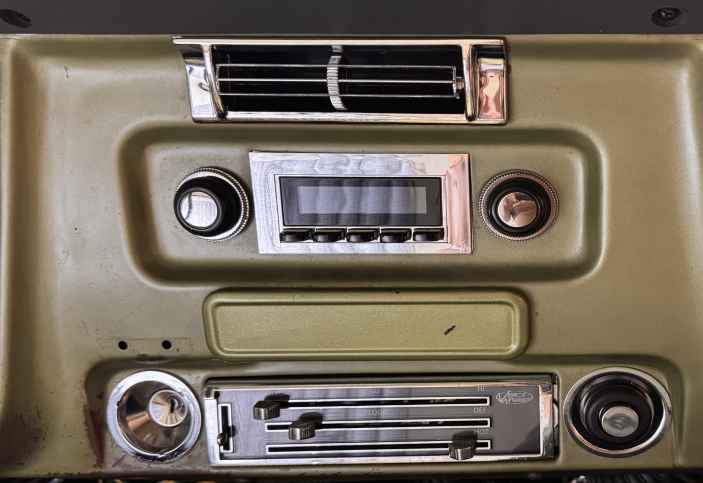
Retrosound RetroRadio
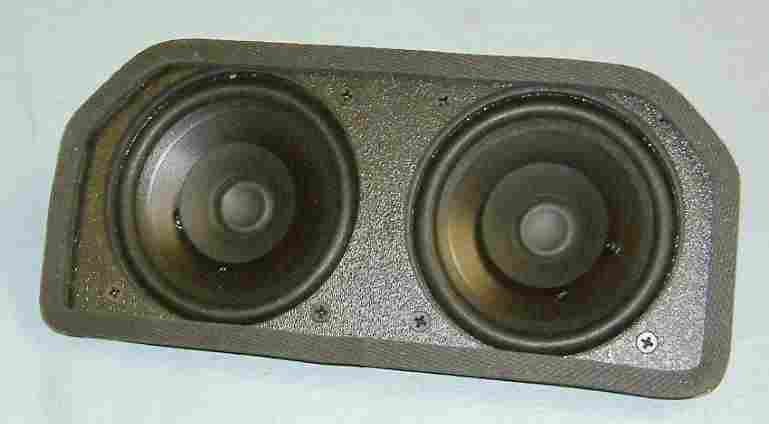
Dual 4" Speakers in
4x10 Special Rectangle Mounting
The Air Conditioning system was replaced with a Vintage Air system. Since my truck originally had factory AC, this system uses the original in-dash control, but puts a new faceplate on it to indicate the correct functions. This system has electric switches & motors only - no cables or vacuum are used to open/close dampers. The Vintage Air system uses the original dash vents. The heater - A/C unit fits higher up under the dash than stock, and you lose depth in the glove compartment. The under hood housing goes away, since it has been moved behind the dash.
To get the old parts off of the firewall, the passenger-side inner fender needs to be removed to get access to the screws holding the heater/AC box to the firewall. The inner fender is removed by removing 7 screws along the outside of the fender - these are held on with "J-nuts", which are a captive screw on a metal clip. These tend to rust - I had to grind 2 screw heads off since the J-nuts allowed the screw to turn without unscrewing it. The inner fender is also held on with a large screw in the middle-back, 2 screws near the top that go into the fender, and 1 that goes into the battery box. After that, there are 3 screws at the bottom front. After the inner fender is loose, you can access the 4 nuts holding the AC evaporator and 2 screws holding the fan on. Make sure the heater hoses are completely removed, and the unit on the firewall should then be able to be pulled off.
Under the dash, the glove box door is removed with the 4 screws along the bottom hinge edge, and 2 screws holding the door limiter on. Then there are several screws along the perimeter of the cardboard glove box - once these are removed, the box pushes into the dash and can be pulled out from underneath. At this point there is an enclosure on the inside of the firewall that houses the heater core - this comes off with 2 screws at the 5 and 11 o'clock positions from the inside of the firewall.
There are several heater/AC vent boxes under the dash - remove these carefully, along with the flexible ducts. On my truck, the ducts were still functional, but any pulling on them made them disintegrate. There will be cables on some of the boxes that need to be removed. The only things that are being reused are the control panel, the 2 defrost vents, the 2 round vents at each end of the dash, and the rectangular vent above the radio.
One of the slider arms on my dash control was broken off, so I got a replacement dash control assembly from Vintage Air.
Here are a few lessons learned after installing the Vintage Air heater/AC:
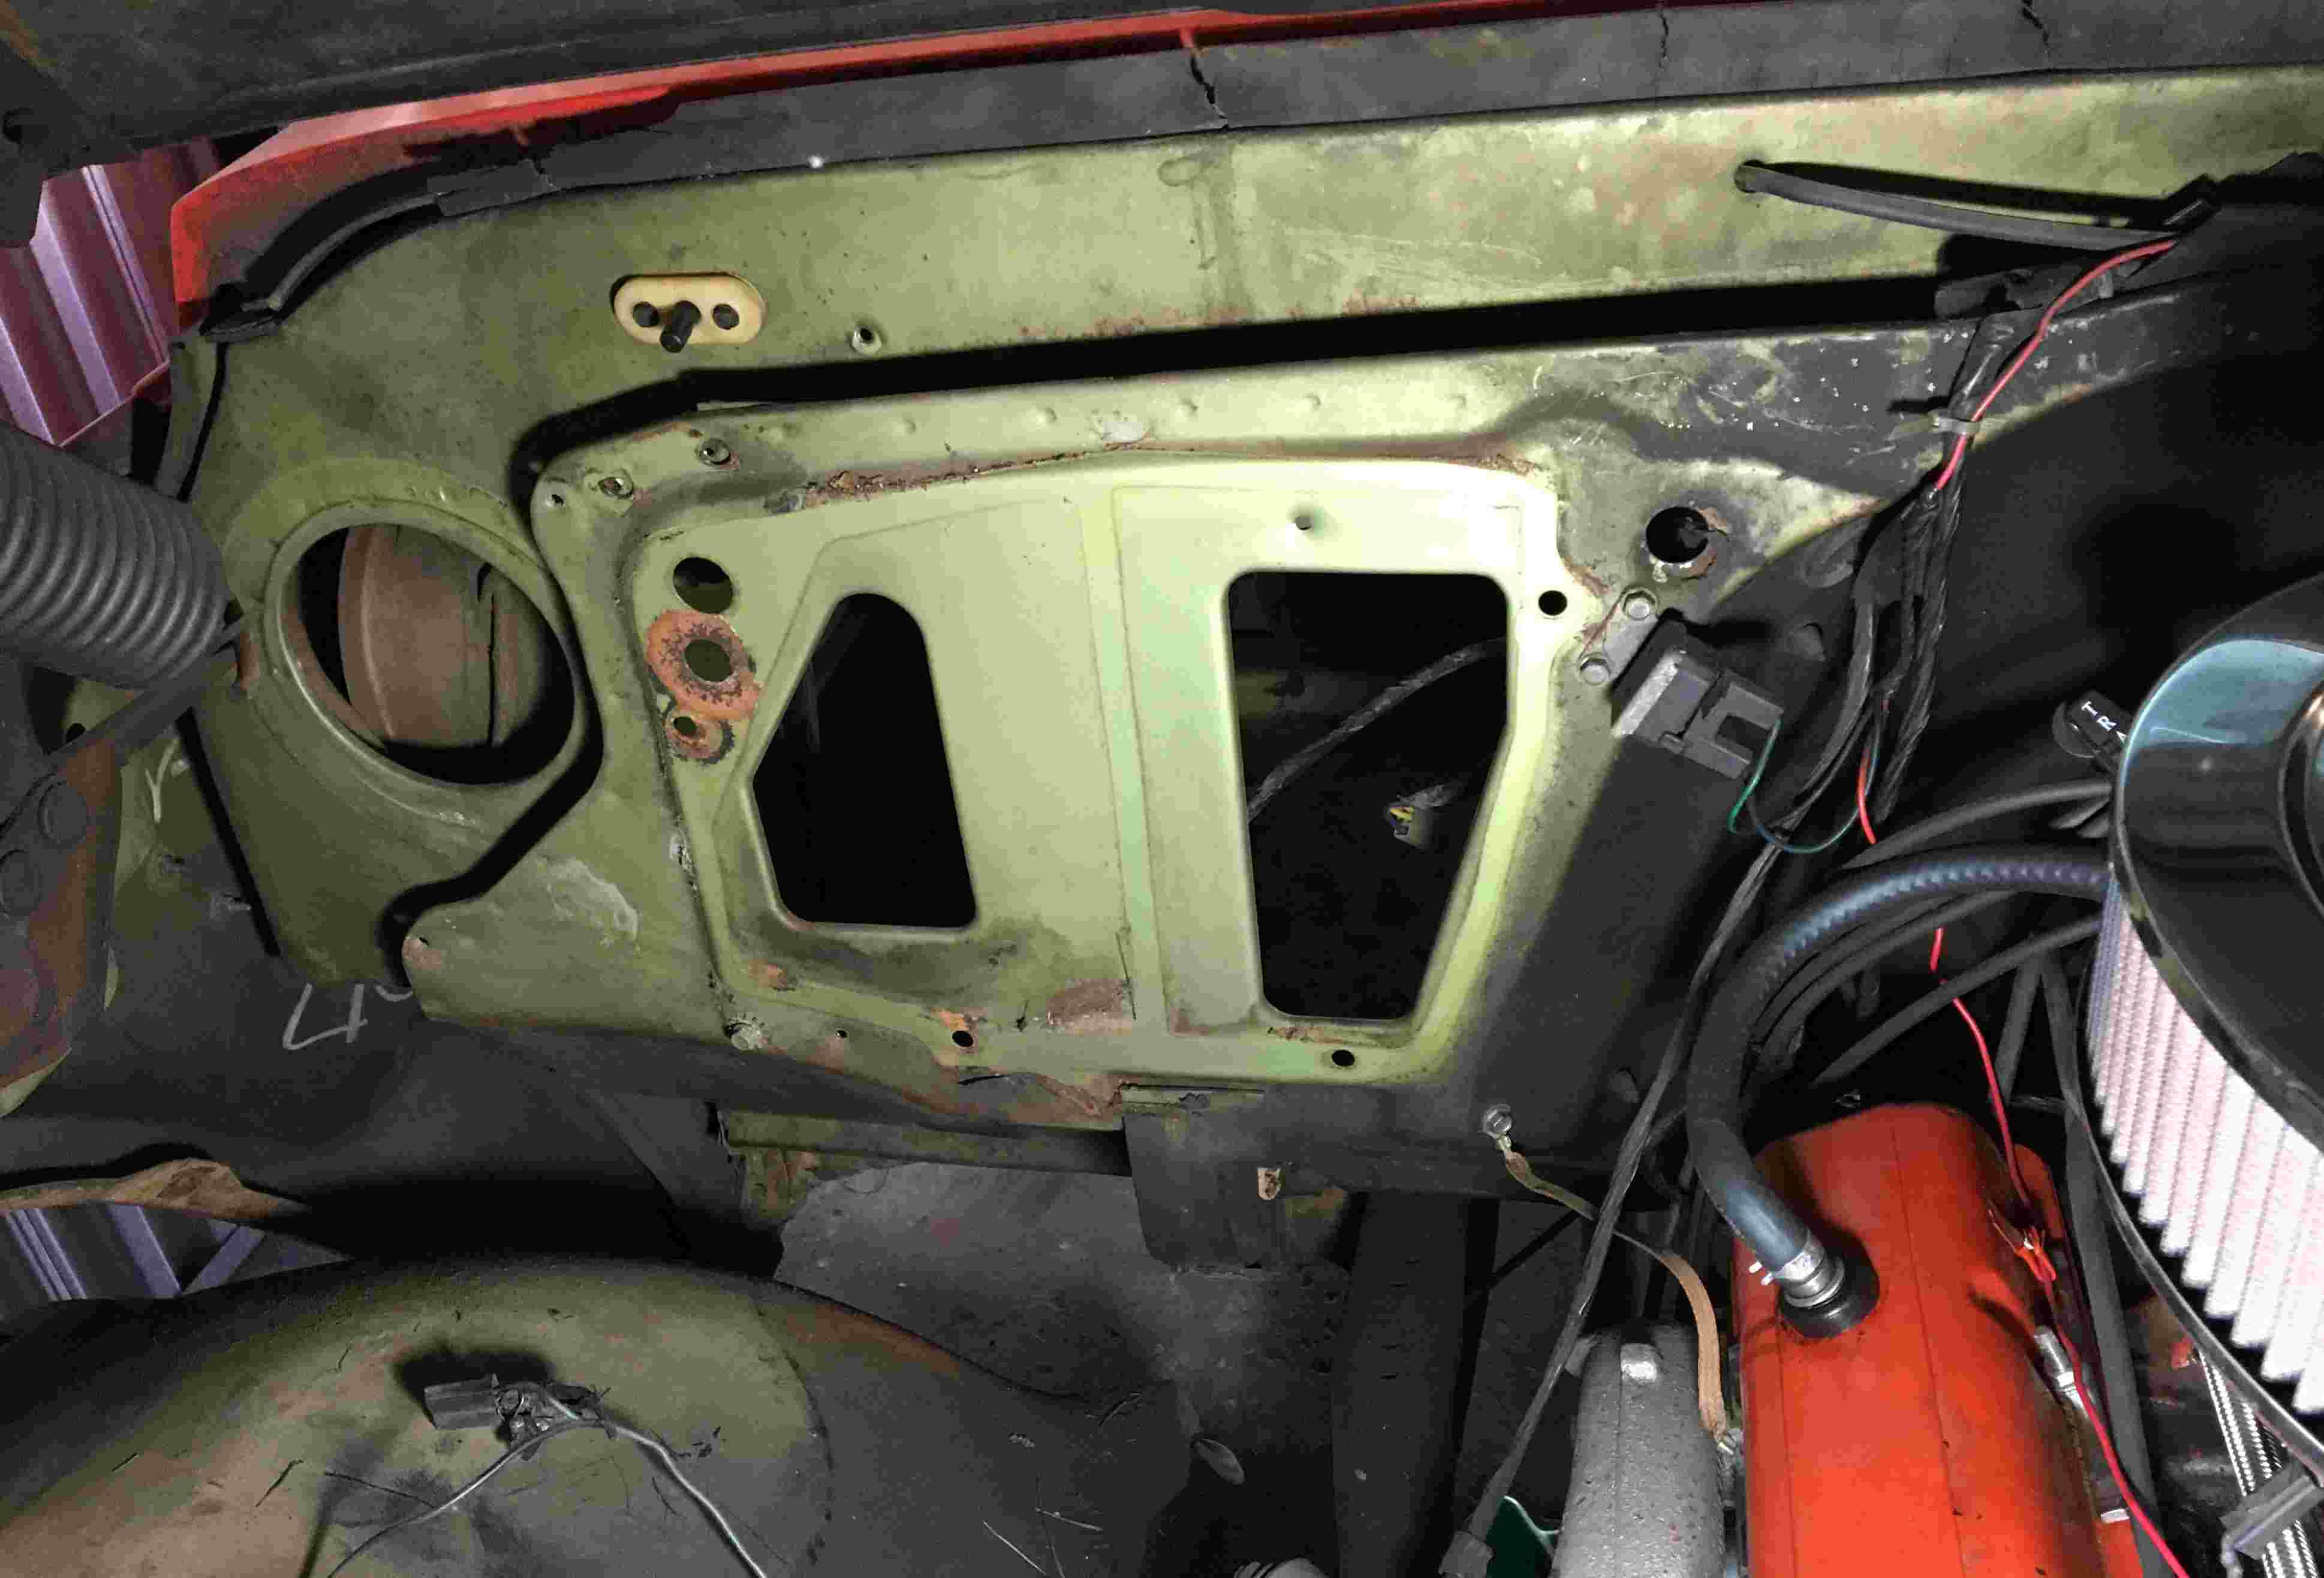
AC Removed
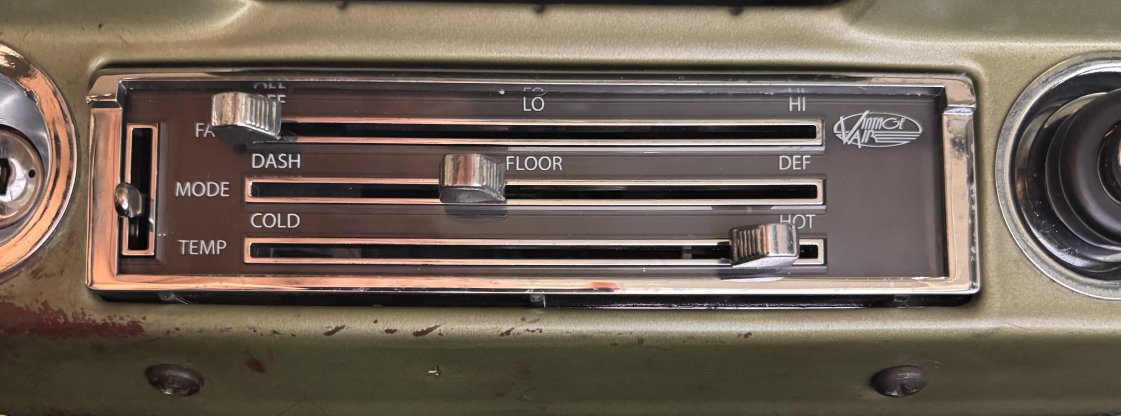
Vintage Air Controls